Well, for something different, I thought I would go through my building process of these little Gachapon Aqua shooters figures which I have been somewhat enamoured with the past few years. For a 500 yen roll, you'll find yourself blessed with either a kit action figure, to be assembled, or some kind of weapon set, also to be assembled.
Admittedly, like the GashaponQuest items, it feels kind of crap if you just do a single roll and just get a a weapon set, which is exactly what happened to me on my first try when I discovered these super late only to find the weapons were the only two left in the machine. Sigh. Oh well moving on.
I'll be building the Aquashooters! 12 series Izumi Motohashi, the one that took me longest to get (I think)... I went a bit overboard with these guys and I think I got the whole set a lot earlier than I thought.
Moving on, let's build a figure! (and weapons!)
Let's start, I started with the weapons set. While the flyer in the ball gives you a how to for the figures, one must jump online to the see the how to for the weapons. In a strange move, the back has four(4) QR codes for you to scan, but none of them take you to the weapon build page. One must follow the little link in the red at the bottom of the coloured side.
I feel that the fists of punch (not an official name) are pretty obvious, except for one bit. The thumbs. I was wondering what that piece was for until I saw the instructions. Just be very careful about cutting them from the sprue as they are small and will attempt to escape to some inaccessible part of the room. THEY WILL FIND ONE.
The trickier part of this weapons set is the blade thing, which they cleverly named "Blade" and guess what, the gloves are called "Glove." Inventive! Anyway, the trickier part is the translucent plastic for the blade. This type of plastic is notorious for being less flexible than your standard type and is prone to easy breakage, so please be careful with removal from the sprue. Now Let's look at out bits.
 |
| Thumbs were accidentally included. |
Disconnect all the bits, add the pointy blade first, the not pointy, but very etched blade second and then plug it all together with the green spikey bit. I.e, follow the instructions above. You'll end up with a whacky future blade and some punchy hands.
And a bunch of microplastics to deal with.
Not too shabby! Well done. The blade can be combined with a rifle that came from (sigh) an online exclusive set of AQS. Which I happened to get. Yay.
Next up :
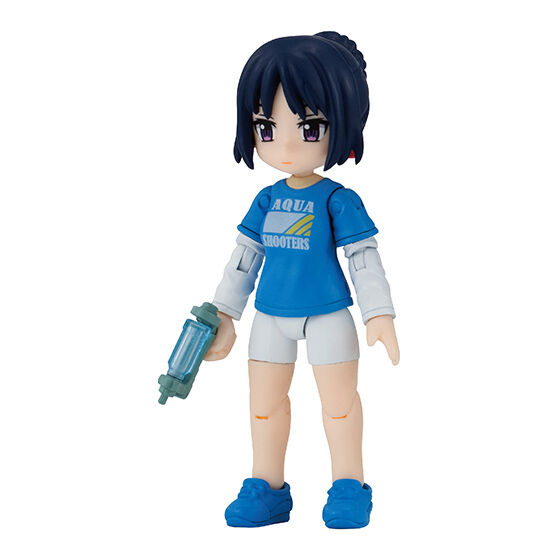
IZUMI chan!!
This one. If you got all three girls in random batch, make sure you match up the arms and legs.
- Izumi Motohashi- Short pants, long sleeves. (black hair)
- Mayumi Nagashima - Short pants, short sleeves. (blue/grey hair)
- Tomoyo Hoshino - Long pants, long sleeves. (Blonde hair)
The bags should look like:
First off, I usually do the head. I think the head needs little explanation and it's just a little thing of mine to have the head watching the building process. Izumi's speciality is the ribbon that ties the bun. You'll have to pull the bun off the back of the head first, then attach the piece and BAM! You have a new hair cut for her.
Nice work, now place her somewhere safe to watch proceedings!
Now onto the body. The torso is premade and to give myself a sense of accomplishment, I always start with the pants.
Er, What?
You heard me right.
These are the pieces you'll need. The pants (back/front) and the hips. Be careful with the hip piece, as it actually has a front/back as well.
Left - front with the little Triangle thing, and the (Right) back with a big back rectangle.
And you can see the pants have similar holes for insertion.
So as you can imagine, slap those pieces together and you have yourself
A piece of arse
To improve this situation, we'll be moving on to making the legs.
These are the bits you will need.
These have left and right pieces, so make sure you keep left with left and right with right. Luckily each piece is usually marked with a respective L/R. They are there, and probably
INCREDIBLY tiny.
So, you can confirm which bit you're working on.
Use this funky looking piece of plastic to slap the pin into the joint. For the legs, you'll need the shin/calf, a joint and the pin. Shove the pin into the joint and your lower leg is set!
Once you've set the joint, grab the skin coloured thigh piece and jam it over the top of the pin. THEN all you have to do is pop the white top half of the thigh on top and you have a leg. Finally plop the shoe on the ball joint.
Well done! Now repeat for the other leg. Now let's move on to the arms!
Joints on the right, Upper arms (blue), upper arm sleeves(little white), forearms (white), hands (fleshy).
Once again, we'll be using the doodad to shove the pins in to make the joint. Using the blue shoulder pieces, you'll have to eventually join the little white sleeve pieces together. These are L/R pieces, so be careful. Also, you'll have to align them to the blue pieces as well.
The next step is to make the pins for the elbows and forearm areas. Which will require the following bits.
On the joint/pins be careful to make sure you clean the tree nubs from the pieces because they'll be the joints and can hinder the movement if you're not careful.
So chuck the pin in and you have the elbow made. NOW, you must put the sleeve piece over the pin, and shove the whole thing into the blue upper sleeve.
And you get yourself a whole arm. Now just do the same process with the other side. Oh and slap a hand in there.
And now you should have all your pieces made, and you just have to join them all together:
 |
| Nothing to see here |
And the end should look a bit like this and this if you give her weapons
It would seem that this round of Aquashooters! Are very similar to some that turned up during Japanese summer vacation time last year as well.
These guys have the same T-shirt design.
Thematically appropriate, especially since water pistols are a thing that little kids in Japan often like to use. Well, the shops usually have a bunch on display for sale at the very least.
Oh, and I personally have a tendency to jam some small 2mm diameter magnets in the base of their feet to make them a bit more stable. I also slapped some metal strips on the shelving I used for my Aqua Shooters and Gashapon Quest figures.
 |
| Waiting for the glue to dry. |


No comments:
Post a Comment
Comments under moderation until I find around this spam thing.